May 8, 2025
What Is Amazon Seller Central Account and How Does It Work?

According to Statista, more than 200 million people visit Amazon to shop for their favorite items each month. The marketplace oversees the majority of eCommerce sales worldwide, generating billions of dollars in revenue. There is no denying that Amazon provides the single biggest opportunity to both established brands and upstart entrepreneurs to grow their businesses and take them to new levels.
Registering at Amazon Seller Central is relatively easy; however, navigating through it can feel confusing at times especially for new sellers. With a multitude of options to go through and features to use, it could be hard to decide where to begin and what to prioritize—we get it.
That’s why we’ve decided to compile an in-depth Seller Central guide where we’ll cover everything regarding the Seller Central dashboard including the basics. Think of this blog as a complete walkthrough of what Seller Central looks like from the inside and how to utilize every tool to maximum effect!
Table of Contents
- What is Amazon Seller Central?
- Who Can Open an Amazon Seller Central Account?
- Is Amazon Seller Central Free?
- How to Create an Amazon Seller Account
- How Does Amazon Seller Central Work? An Inside Tour!
- Amazon Seller App – Using Seller Central on Your Mobile
- How Do I Get Paid on Amazon Seller Central?
- Is Amazon Seller Central Safe?
What is Amazon Seller Central?
Amazon Seller Central is a systemized dashboard that connects sellers to the backend of the Amazon marketplace, allowing them to add and manage products, create shipment plans, handle customer queries and returns, run ad campaigns, and control store operations on the whole.
Amazon’s intent behind creating such a complex dashboard is to make it easier for sellers to run their business via a one-stop web interface.
Regardless of whichever business model you choose—arbitrage, private label, wholesale, or dropshipping; the Seller Central dashboard is where your Amazon journey begins.

Who Can Open an Amazon Seller Central Account?
Anyone can open an Amazon seller central account. You just need to have valid ID documents, an email address, a credit card, and an active bank account.
Private label brands
Amazon is getting increasingly popular between private label brand owners and manufacturers. It gives them a turnkey platform to expand their businesses and personalize their customers’ shopping experience through programs like Brand Registry, A+ Content, and more.
Retailers
Retailers can also use Amazon to boost their store sales. They can list their products online in a matter of minutes and start selling on the world’s largest eCom marketplace, straight from their in-store office desk.
Individuals
You don’t have to be an established brand or a retail store to sell on Amazon. Singing up on Seller Central is viable even for individual sellers with limited budgets. Just about anyone can engage in wholesale, dropshipping, or even sell random items lying around in the house.
Amazon Seller Central vs. Vendor Central
It’s worth mentioning here that Amazon allows both third-party sellers and vendors to sell on its platform. What’s the difference between the two? And which option should you sign up for? Let’s take a closer look.
What is the Difference Between Seller and Vendor?
Amazon sellers are third-party (3P) sellers who directly sell products to customers on Amazon. They create their own listing and set a price as they see fit. More than half of Amazon’s unit sales come from 3P sellers. In contrast, vendors are first-party sellers—usually manufacturers or distributors—who sell in bulk directly to Amazon which then resells those products under its brand name.
Both sellers and vendors have separate dashboards that they use to run and monitor their businesses on Amazon.
What is the Difference Between Amazon Seller Central and Vendor Central?
The primary difference between Seller Central and Vendor Central is Seller Central is open to anyone, while Vendor Central is an invite-only platform. Other differences are as follows:
Fulfillment options
When operating Seller Central, you have two fulfillment options: FBA (Fulfillment by Amazon) and FBM (Fulfillment by Merchant).
In FBA, Amazon handles the entire fulfillment process on your behalf. You simply transport your inventory to Amazon’s warehouse where it picks, packs, and ships products to their final destination. Even the returns are managed by Amazon. FBA is popular with 3P sellers as it saves them from a lot of unnecessary hassle in exchange for a nominal fee.
In FBM, sellers have complete control of customer service and other fulfillment-related processes. As such, they must handle packaging and deliveries on their own, although some FBM sellers hire third-party logistic (3PL) services to help them out.
With Vendor Central, sellers ship inventory to Amazon for further processing or use Vendor Central direct fulfillment to drop ship products to customers on Amazon’s behalf.
Vendor Central has a strict set of requirements and rules for fulfilling purchase orders that new vendors often struggle with.
Payment terms
Seller Central users get paid every 14 days, while Vendor Central users get paid depending on their contract.
There are three types of contracts vendors are offered by Amazon:
-
Net 30; where Amazon pays you every 30 days but deducts 2% from your final amount
-
Net 60; where you receive your payment after every 60 days
-
Net 90; where Amazon makes the payment after every 90 days
Needless to say, the net 60 option is the most popular among the masses. However, you must plan things the right way to avoid any cash flow issues in the long run.
Pricing
Seller Central users have complete freedom to set, maintain, and change their product prices in search of higher profit margins.
On the contrary, vendors with the “Ships from and sold by Amazon.com” badge cannot control their pricing. They simply set their wholesale prices and a minimum advertised price (MAP)—the lowest price you can sell a product for on Amazon.
Amazon says that it honors the MAP. However, that usually isn’t the case and ends up significantly affecting its vendors’ profit margins.
Advertising
Sellers and vendors both have access to similar advertising features through Amazon Advertising and Amazon Marketing Services (AMS), respectively. These options allow brands to put themselves out there and enhance their visibility by strategically targeting specific keywords.
However, vendors enjoy one clear advertising advantage over their counterparts. Unlike sellers, they don’t need a brand registry to create A+ Content.
Sales
Customers trust Amazon. And it is safe to say they prefer buying from Amazon rather than third-party sellers.
Vendors also benefit from the fact that they are more likely to get the buy box or appear in search results thanks to the Amazon label that they flaunt. All of this results in a massive increase in sales, especially when it comes to high-ticket products.
That being said, third-party sellers can outshine vendors by using the right pricing strategy and marketing techniques.
Verdict: This isn’t a choice most of the time, but if you get invited to join Vendor Central, we would recommend that you stick to Seller Central. Vendor central may get you more sales and visibility, but Seller Central gives you extra flexibility and control of your product, albeit with a bit more work. Of course, the final decision is yours to make.
Is Amazon Seller Central Free?
Seller Central is not free to use. If Amazon provides so many seller-friendly features, it goes without saying that it will charge you for it.
So how much is the fee?
How Much Does Amazon Seller Central Cost?
Depending on the plan you choose, Individual or Professional, Seller Central may cost you $0.99 per unit sale or $39.99 per month.
The individual selling plan is for anyone who aims to sell less than 40 products a month, while the professional selling plan is for any seller willing to take things up a notch. Subscribing to the latter opens up access to special Seller Central features like advertising, inventory management via feeds, analytical reporting, running promotions, etc., for a fixed fee of $39.99 per month.
In addition to the subscription fee, you must also pay additional fulfillment fee, storage fee, referral fee, removal fee, and sales tax collection fee whenever applicable. These vary depending on your niche and selling method (FBA or FBM). Learn more about the different types of seller fees in our comprehensive Amazon seller fees list.
How to Create an Amazon Seller Account
Now that we’ve gained a firm understanding of the Amazon Seller Central basics, let’s move forward with the Amazon seller account requirements and the setup process.
First, you need to decide which marketplace you’ll be selling in. Sellers have the option to sell in 18 different Amazon marketplaces, with the most notable being the US, UK, Canada, Germany, Japan, and Australia.
Bear in mind, though, you don’t have to be located in one of these countries to sell on Amazon. The eCom giant allows registration from over a hundred countries, and you can always expand and sell globally.
For Amazon seller central US, you’ll need the following:
-
Legal entity and its federal task classification ( if you want to operate as a business) or an Identity document (if you are a citizen and selling individually)
-
US-based address
-
Government-issued photo ID
-
Chargeable credit card
-
Bank account number (to receive payments)
-
Utility bills
-
Contact number
-
Tax ID and SSN
For Amazon Seller Central UK, you’ll need the same except instead of an SSN and US address, you’ll need a:
-
UK Address
-
UK VAT ID
Once you’ve gathered all the required documents, go ahead and register. Amazon will verify your details and decide whether you’re authorized to sell or not. This can take anywhere from 24 hours to several weeks.
Why is My Amazon Account Inactive?
Your Amazon account may get inactive if left idle. To fix the issue, contact the Seller Central support team. They may ask you to resubmit your identity verification documents to reactivate your account.
How Does Amazon Seller Central Work? An Inside Tour!
It’s time for the most exciting part. We’re going on a tour of the Seller Central dashboard where we’ll walk you through the main options to help you navigate the web interface like a pro. Let’s begin.
Main Dashboard
The main menu is found just below the Amazon logo. Here, you can access all the different options and features available in Seller Central. It contains the following tabs:
-
Catalog
-
Inventory
-
Orders
-
Advertising
-
Stores
-
Growth
-
Reports
-
Performance
-
Appstore
-
B2B
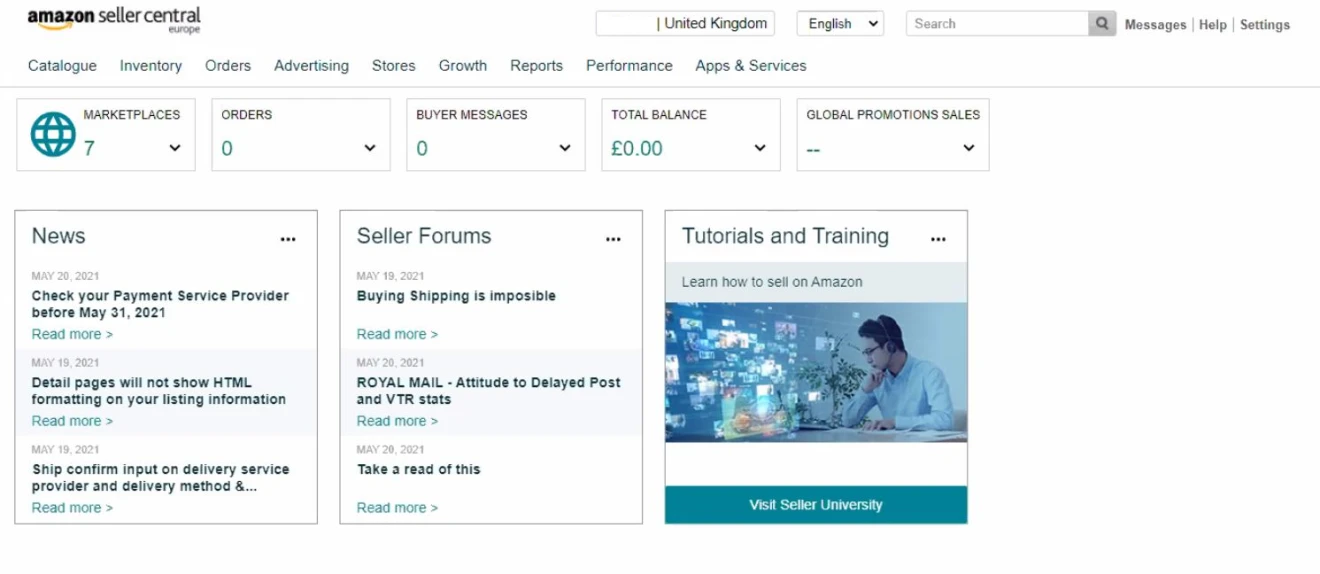
On the extreme right, marked in black, you have three buttons that ease your Seller Central navigation.
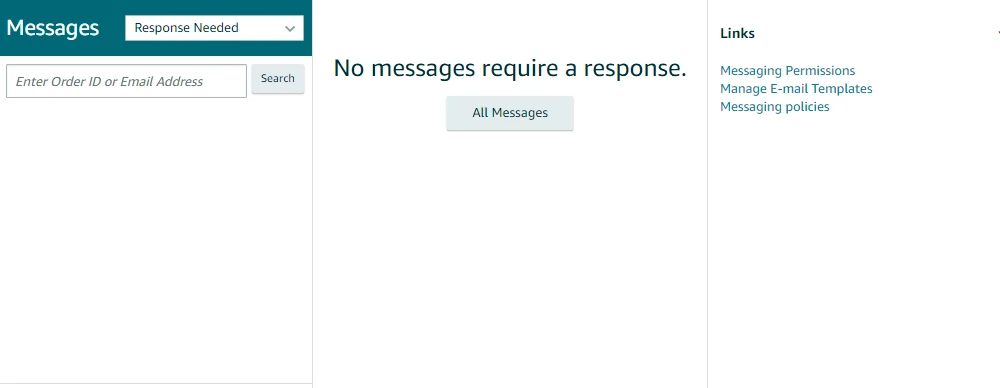
Messages: This opens up any and all messages that need to be answered. It’s best to answer them promptly so as not to harm your account health.
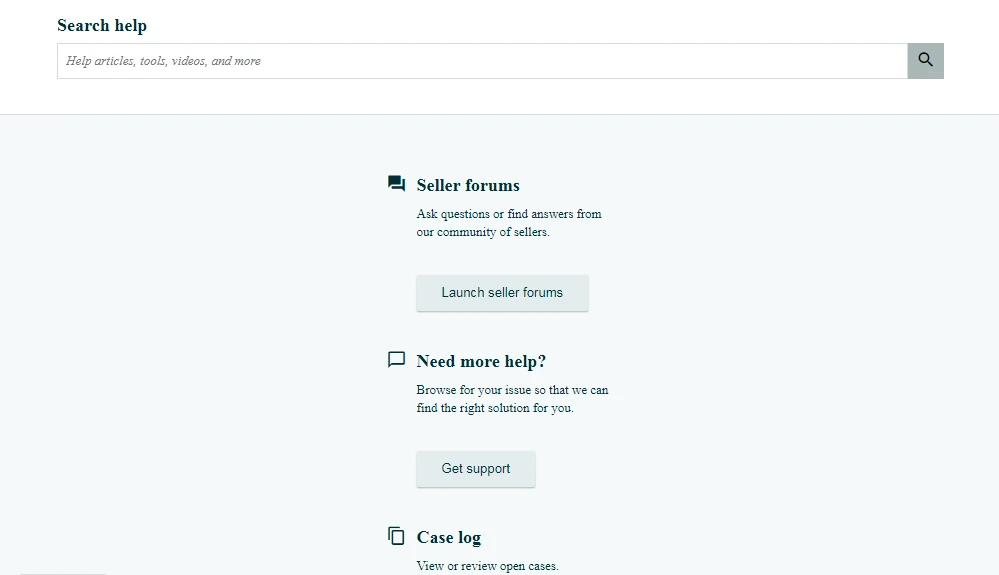
Help: Here, you can find articles related to any questions you might have, access seller forums, and contact seller support.
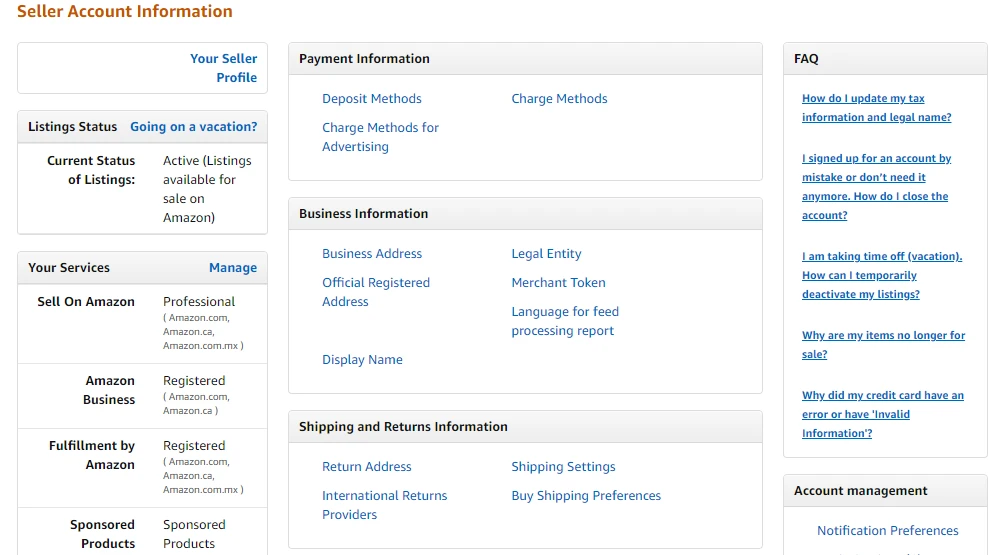
Settings: As the name suggests, this is where you control the technical aspects of your Amazon account, i.e., update your personal information, manage your fulfillment settings, give permissions to users and 3rd party apps, etc.
Below the main menu, you have a drop-down globe icon called the marketplace switcher. It helps you switch your account between the different marketplaces you’re allowed to sell in.
Here are other helpful widgets that provide a brief overview of the account. These include:
-
News: This is where you get updates on all things Amazon, whether it is a new policy change or a new feature being introduced
-
Orders: This widget provides a brief on the number of pending orders
-
Sales: The sales summary widget gives you a quick rundown of your ordered product sales and their units.
-
Poll: This widget is more for Amazon, where it solicits feedback on how to improve the dashboard or fix common issues.
How to Add Products to Amazon Seller Central
When you’re ready to list your products for sale, head over to the Catalog tab and select Add Products. If the product you are selling is already listed on Amazon, simply enter the product ASIN to add the product to your catalog. To create a new listing:
-
Click Add Products.
-
Select, I’m adding a product not sold on Amazon
-
Search for an appropriate product category or browse manually to find the right one
-
Add your product details in the Vital Info, Description, Keywords, Offer, Images, and More Details tabs. At times, the required information will vary due to the product type and will be marked with a star.
-
Once you have entered the information in the tabs provided, click Save and Finish.
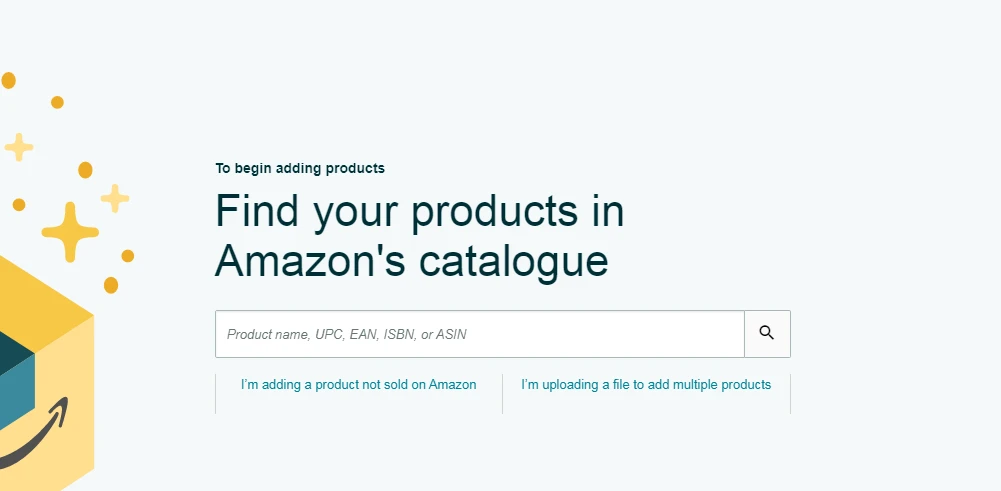
Amazon will take 15 minutes to review your listing and if everything is in order, your offer will go live in the search. Check out our complete step-by-step guide on how to add products on Amazon.
On a side note: You can make changes to your product listings even after they are published.
What is Product ID in Amazon Seller Central?
The product ID is a mandatory field that must be filled when creating a listing on Amazon. It is the barcode of your product, also known as the Global Trade Item Number (GTIN). It helps to identify your product in the global supply chain.
There are many types of GTIN, i.e., UPC, EAN, JAN, or ISBN. The most commonly used GTIN for Amazon listings is the UPC (Universal Product Code).
Amazon Seller Central Analytics – Monitoring Your Business Performance
As an active seller, you’ll want to monitor your sales, account health, seller performance, conversion rate, inventory, payments, etc. This can be done by accessing different tools available inside the Reports and Performance tabs of Seller Central.
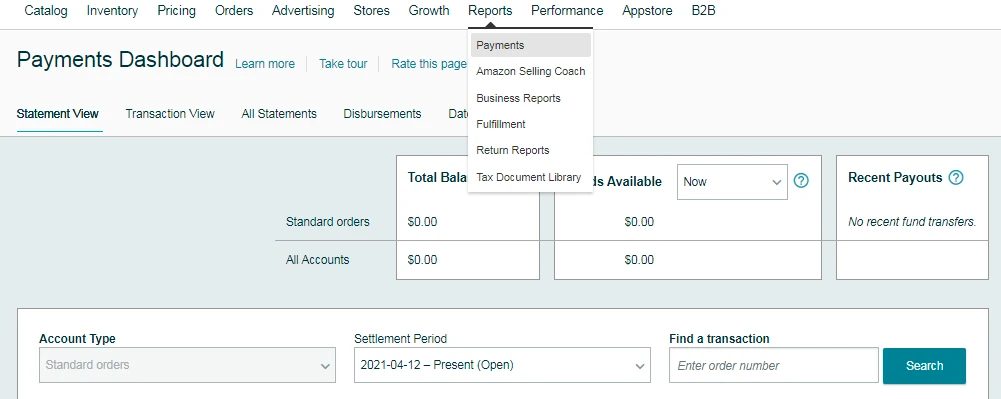
Payment reports: The payments report details all the payments Amazon has remitted to you and gives a complete breakdown of your transactions.
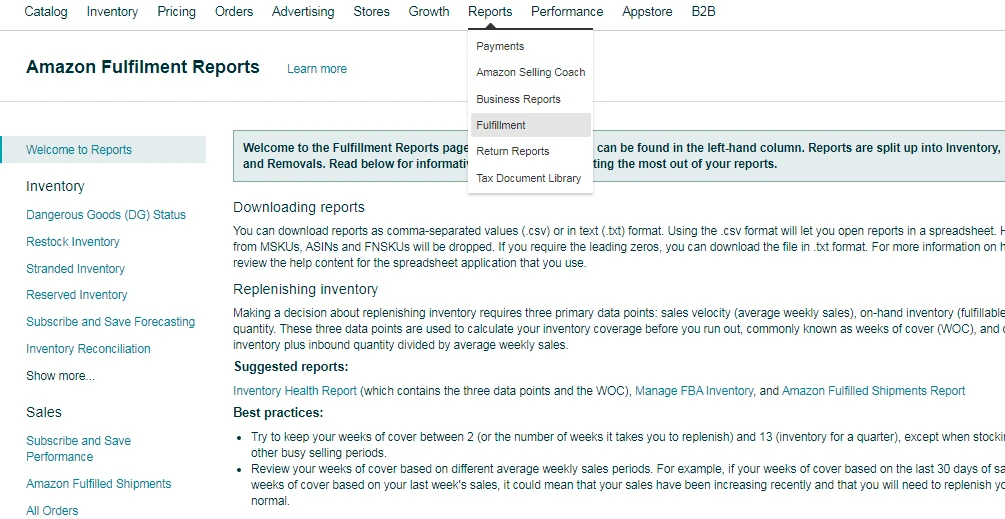
Fulfillment reports: These FBA reports provide information about the inventory stored in Amazon warehouses, Amazon-fulfilled shipments, total tax collections, and so on.
Business reports: These are probably the most important reports you need when evaluating your business and finding growth opportunities. There are three types of business reports:
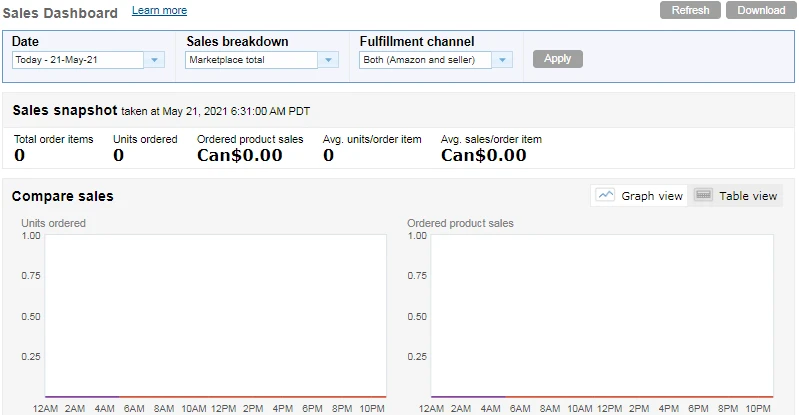
Sales Dashboard gives you a birds-eye view of your sales and orders and other trends to study and compare your sales in different time intervals.
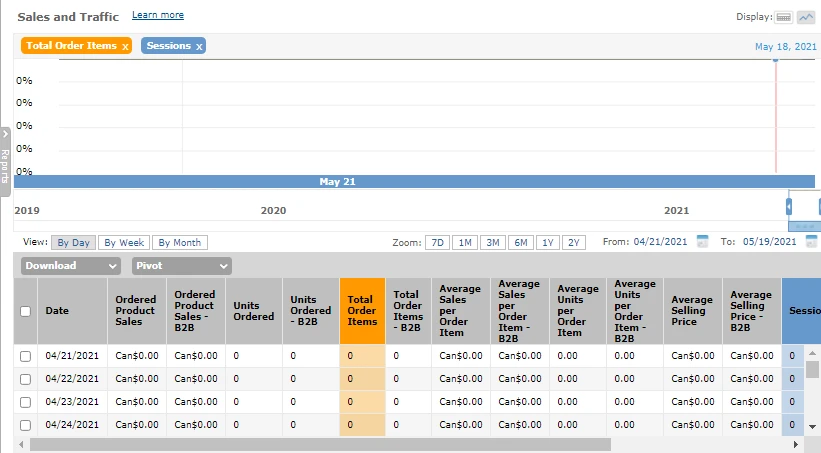
Sales and Traffic report reveals the buy box percentage, conversions, and traffic diverted to your product(s) for a specified time frame.
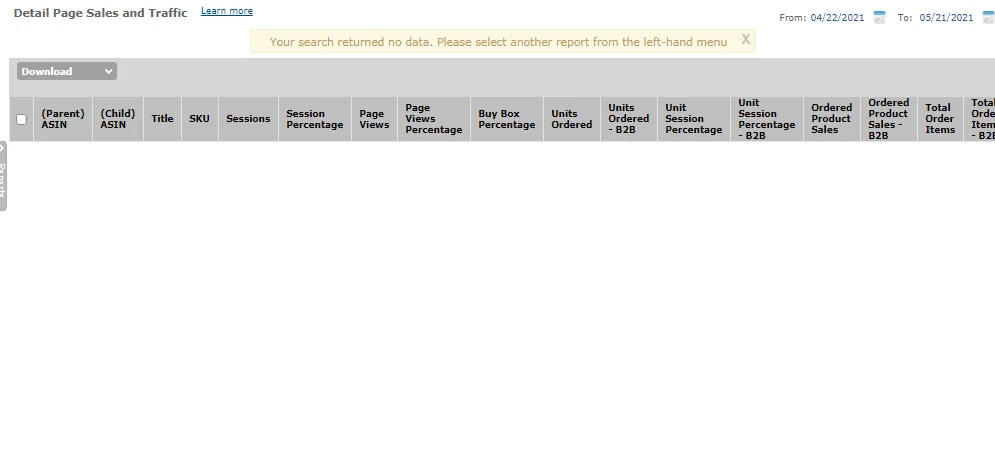
Sales and Traffic Report by ASIN is an extensive version of the Sales and Traffic report and can be viewed at both parent and child levels.
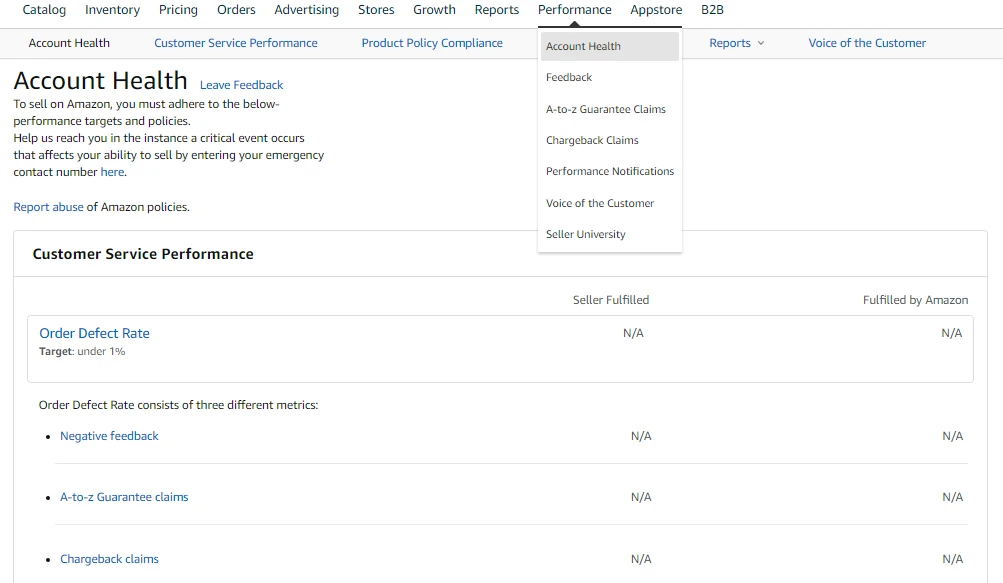
Account Health: This page breaks down your account’s performance for customer service, policy compliance, and product compliance.
What is IPI in Amazon Seller Central?
Amazon uses IPI or Inventory Performance Index to analyze how sellers manage their inventory and score them accordingly. It’s a measure to get sellers to optimize their inventory in a better way. An IPI score of less than 350 is considered poor and may result in storage limits for sellers. You can check your IPI score from the Inventory Planning dashboard, present under the Inventory tab.
Here are a few tips to help you improve your IPI Score:
-
Reduce excess (overstock) inventory
-
Enhance your 90-day rolling sell-through by maintaining the right balance of stock over the same period
-
Ensure inventory is buyable
-
Increase your sales by keeping hot items in stock

Amazon Sales Tax Collection
Like all online retailers, Amazon sellers are also required to collect sales tax from their customers. You can collect sales tax if your product is taxable and you have a sales tax nexus in a particular state.
A sales tax nexus is a fancy way of saying that you’re legally connected to a state. This could be if you have a store, inventory, affiliates, etc., in that state.
Collecting sales tax is a nightmare. Luckily for you, Amazon automatically collects and remits sales tax on your behalf in states where marketplace facilitator laws exist. However, you need to have a valid tax permit to collect sales tax from your customers.
To set up sales tax collection in the non-marketplace facilitator states, go to the Settings tab in Seller Central, select Tax Settings, and add states for which you want to collect the tax. File the sales tax manually. Use tax software to avoid any filing errors.
What is Total Balance in Amazon Seller Central?
The total balance in Seller Central is the amount of money that gets transferred to you after deductions. These deductions may include pay-per-click advertising costs and any seller proceeds such as referral fees, seller fees, FBA fees, storage fees, etc. It may also include all unavailable balances.
Unavailable balances are the funds Amazon withholds to cover for possible refunds, chargeback, or buyer disputes.
Amazon Seller Support – How It Works
Amazon has one mission and that is to be the most customer-centric company in the world. To achieve that, it provides support to its buyers and sellers over chat, email, and phone—24/7.
Got a problem? Require assistance? Try Amazon Seller Support. You can get quick answers to frequently asked questions for basic problems or contact the Seller support team for personalized inquiries or assistance.
Although you cannot get the Amazon Seller Central phone number directly, you can reach out to Jeff and his team by opening a case. When you’re communicating with a representative, be concise, have the accurate information ready, and mention the steps you’ve already taken to resolve the issue. If you’ve tried to resolve the issue on your end, there won’t be any back and forth and the support team will attempt to resolve the problem immediately.
Sellers can also get access to detailed learning content and thorough guides for each step of the seller journey by checking out the Amazon Seller Central University.
Amazon Seller App – Using Seller Central on Your Mobile
Being an Amazon seller means you need to be constantly updated on what’s happening to your account, how many orders need to be fulfilled, and check if any buyer messages need to be answered. Despite your best efforts, it’s impossible always to be active.
To keep up with your seller account and customers, download the Amazon seller app on your smartphone. It provides updates on the go and doesn’t cost a dime. It has almost the same features as the desktop version, just placed differently.
Using the seller app, you can:
-
Receive notifications and critical updates regarding messages, orders, and your account health
-
Take product pictures, edit and save them on your mobile
-
Manage orders, inventory, shipment, and advertising
-
Track your sales and conduct business analysis
-
Answer customer queries and complaints
-
Contact seller support
How Do I Get Paid on Amazon Seller Central?
Amazon pays sellers through bank transfers using ACH or electronic payments. The payment is made every 14 days. However, you may retrieve the funds earlier using the Request a Payment option.
Amazon automatically deducts your proceeds and displays the amount payable to you in the payments dashboard. Once initiated, the payment can take up to 5 days to show up in your bank account.
Is Amazon Seller Central Safe?
100%.
Amazon ensures that its marketplace is safe to use for both buyers and sellers. Sellers can also control user permissions for virtual assistants when hiring them to take care of business affairs without revealing confidential details.
However, like all things on the web, Amazon Seller Central can be hacked. If this happens to you, immediately change your password and contact seller support regarding the issue. As an extra safety measure, it's best to enable two-factor authentication.
Conclusion
To sum it all up, Amazon Seller Central is an easy-to-use dashboard that allows you to create, modify and optimize product listings, monitor performance and customer metrics, and keep track of pretty much all your business operations and reports.
We hope you found this guide on Amazon seller central helpful.
Looking for the next step?
Check out our handy, How to find products to sell on Amazon guide, where we give you actionable tips and insights on how you can find the most profitable products for your business.


